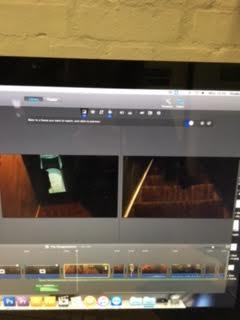
When it came to editing our thriller opening, we found it hard to become familiar with a piece of software called iMovie. iMovie enabled us to incorporate sound, crop our shots, shorten the clips, make them slow or fast and also gave us the option to change the saturation and contrast of the shots in order to bring some suspense and tension into the atmosphere of the video. Once we began editing, it became a lot easier to use and take advantage of every aspect of iMovie. The outcome was ultimately successful.
In the picture to the left you can see that we used the cropping tool. We took advantage of this tool because we realised that our shot was focusing too much on the antagonist background. For this particular scene, we wanted to build suspense and tension for our audience by using a close-up that showed the intruder looking around the vulnerable victims home. Therefore, we wanted more focus to be on the antagonists face, rather than their surroundings. To get some input from our target audience, we decided to go around our school and ask the individuals within our target audience age range which would be more effective, 90% of our 10 participants agreed that cropping the shot made this scene more effective as it brought more focus and attention to the character.
For this shot, we used the colour and cropping tools. Once we analysed the footage, we found that the laptop was too bright, and was unable to capture the conversation between the victim and her boyfriend, which was a crucial shot that caused suspense as the victim then realises that it was a real, dangerous intruder in house. To fix this, we brought the contrast and saturation down, which made the writing more prominent so that it was visible to the audience.
Additionally, we used the cropping tool to put the focus on the couples conversation, rather than on the social media newsfeed in the background. Although the social media brought a sense of realness to the shot, we didn't want our audience to get distracted. Therefore this was a useful tool to bring focus and tension to the audience.
The next tool we used was the stabiliser. This was something that we took advantage of in quite a few of our shots as it gave them a professional look. When we took the shot of our antagonist walking up the stairs, we noticed that it was quite shaky. This was because we were recording with our hands, and not with a tripod. Due to the low angle we took it from, we were only able to hold the camera ourselves. To fix this we used the stabiliser tool on 33%, this meant that it took the shakiness away and made the shot look more professional.

This particular tool is called 'match colour' and was significantly important in the building of suspense within our thriller. It also brought a sense of continuity into the shots. Match colour is an interesting aspect of the iMovie software, as it enables the user to make all of your shots a similar colour. To do this, you choose what clip that you want to replicate, and then you click on the second shot that you want to look the same as the other (in regards to colour, saturation and contrast). This enabled us to make the first portion of our thriller opening light, and the last portion of it dark. This ultimately aided in making the audience feel safe at the beginning (like the victim), and then later on, the pattern of darkness brought a sense of vulnerability and suspense. Therefore, this editing tool enabled us to to create a tension-filled crime thriller that enticed the audience to feel the same emotions that the victim does.
Additionally, we used a transition shot at the beginning of the opening of the thriller in order to ease the audience into the film. This was effective because it set a bright and calm atmosphere for the audience, which is what we wanted to achieve for the beginning of the thriller in order to trick them into thinking everything would be okay.
Additionally, we used a transition shot at the beginning of the opening of the thriller in order to ease the audience into the film. This was effective because it set a bright and calm atmosphere for the audience, which is what we wanted to achieve for the beginning of the thriller in order to trick them into thinking everything would be okay.


No comments:
Post a Comment