Wednesday 15 March 2017

Behind The Scenes- Directing

In the YouTube video above, it is clear that my group and I were able to voice our opinions and give directions to each other, in order to  make our thriller work well and look professional. As you can see and hear, Nikki and Libby were able to tell me where to stand and what to say, which was very crucial in the making of our thriller opening. As well as this, I also gave my own opinions as to how I should be positioned, and how Rhiannon (our antagonist) should act. Although we mainly gave directions as a group, we also incorporated a lot of Rhiannon's ideas (who was not in our media group), as it gave us an outsiders opinion that was much more objective; this was also helpful as she was within our target audience age group, meaning we were interested in her feedback. 

Positioning within the shot was important to us as we wanted to keep the focus on our vulnerable character, whilst still being able to incorporate her stereotypical 'girly' and vulnerable room that we created. This enabled us to stimulate and provide a safe environment for our audience, which we later manipulated to form our tense crime thriller. Directing was an important part of this process, as placing me in the middle of the room enabled us to put all of these things into action; as it incorporated an equal amount of the character and location. We did the same for our antagonist character as this created a flowing thriller opening that didn't distract our audience from our main themes and patterns that we came up with in our initial ideas.

Directing played a crucial role to us as it gave structure to our filming process. All being a part of this enabled our group to come  up with constructive criticism and come to a consensus on our decisions. Overall, giving everyone the role of a 'director' was helpful, as it meant we was all able to communicate and work well as a team.

Tuesday 14 March 2017

Behind The Scenes- Editing

When it came to editing our thriller opening, we found it hard to become familiar with a piece of software called iMovie. iMovie enabled us to incorporate sound, crop our shots, shorten the clips, make them slow or fast and also gave us the option to change the saturation and contrast of the shots in order to bring some suspense and tension into the atmosphere of the video. Once we began editing, it became a lot easier to use and take advantage of every aspect of iMovie. The outcome was ultimately successful.

In the picture to the left you can see that we used the cropping tool. We took advantage of this tool because we realised that our shot was focusing too much on the antagonist background. For this particular scene, we wanted to build suspense and tension for our audience by using a close-up that showed the intruder looking around the vulnerable victims home. Therefore, we wanted more focus to be on the antagonists face, rather than their surroundings. To get some input from our target audience, we decided to go around our school and ask the individuals within our target audience age range which would be more effective, 90% of our 10 participants agreed that cropping the shot made this scene more effective as it brought more focus and attention to the character. 
For this shot, we used the colour and cropping tools. Once we analysed the footage, we found that the laptop was too bright, and was unable to capture the conversation between the victim and her boyfriend, which was a crucial shot that caused suspense as the victim then realises that it was a real, dangerous intruder in house. To fix this, we brought the contrast and saturation down, which made the writing more prominent so that it was visible to the audience.

Additionally, we used the cropping tool to put the focus on the couples conversation, rather than on the social media newsfeed in the background. Although the social media brought a sense of realness to the shot, we didn't want our audience to get distracted. Therefore this was a useful tool to bring focus and tension to the audience.
The next tool we used was the stabiliser. This was something that we took advantage of in quite a few of our shots as it gave them a professional look. When we took the shot of our antagonist walking up the stairs, we noticed that it was quite shaky. This was because we were recording with our hands, and not with a tripod. Due to the low angle we took it from, we were only able to hold the camera ourselves. To fix this we used the stabiliser tool on 33%, this meant that it took the shakiness away and made the shot look more professional.


This particular tool is called 'match colour' and was significantly important in the building of suspense within our thriller. It also brought a sense of continuity  into the shots. Match colour is an interesting aspect of the iMovie software, as it enables the user to make all of your shots a similar colour. To do this, you choose what clip that you want to replicate, and then you click on the second shot that you want to look the same as the other (in regards to colour, saturation and contrast). This enabled us to make the first portion of our thriller opening light, and the last portion of it dark. This ultimately aided in making the audience feel safe at the beginning (like the victim), and then later on, the pattern of darkness brought a sense of vulnerability and suspense. Therefore, this editing tool enabled us to to create a tension-filled crime thriller that enticed the audience to feel the same emotions that the victim does.

Additionally, we used a transition shot at the beginning of the opening of the thriller in order to ease the audience into the film. This was effective because it set a bright and calm atmosphere for the audience, which is what we wanted to achieve for the beginning of the thriller in order to trick them  into thinking everything would be okay.

Monday 13 March 2017

Behind The Scenes- Filming

The only location we filmed in for our thriller was a house.We found filming here significantly easy and convenient. We were not only able to take advantage of artificial lighting and already existing props, but we were also able to film whenever we needed to, which was very helpful.
As you can see from this picture, we were filming inside of the house. This particular shot was taken in the kitchen, and we played with the lighting on the camera to bring some vibrancy to the shot. To film, we used the Canon c100 mk1 DAF with the EF 24-105 1:4 LUSM lens. This camera was particularly useful in the filming process as it had certain features that we were able to manipulate in order to make our shots look and sound more professional. We decided to go with a blue saturation and contrast,as this represented darkness and bad events were about to take place.


This feature is quite unique and we used it a lot within our thriller opening. The '7' button is able to put objects within the camera frame into focus. This means that no matter what goes on in the background of the shot, the camera will only focus on this one object. This was useful and effective because it meant that the main focus was on our characters and aided in building suspense, as we could make sure the close-up shots were clear, which helped build a relationship between the characters and the audience. We used this feature when the intruder finally entered the house.
The last feature of the camera that we used during filming was this microphone. This was important for us during filming as it was a high quality microphone that picked up the quietest of sounds in the shot. Because there was a lot of whispering incorporated into our script, this feature of the camera ensured that the audience was able to clearly hear the victim character. Therefore making our intense shots easier for the reader to hear.


During filming, we used this light as our artificial lighting. As it got darker outside, we found it hard to find alternative lighting  that was similar to normal daylight, so instead of using a yellowy lamp, we chose to use a LED lamp. This white lighting was realistic and made sure that our shots were bright and clear. This also avoided fuzziness in the shots and would of been a lot harder to use if we was to of chosen a different location to film.

Sunday 12 March 2017

Behind the Scenes- Sound

Sounds
As you can see in the image to the left, we used various techniques in order to make our sound effects stand out to the audience. In the clip on the top left, we had muted it. This was in order to make sure our sound effect did not have background noises such as creaking floors or talking from where the characters were given directions. This ensures that our thriller sounded professional. The next tool we used was something that fades the music out, so that it does not come to a harsh stop. This was useful when overlapping clips, as this soft and subtle continuation from one sound to another ensures that it all works together well and flows so that it comes across professional.
The second tool we used was overlapping sound clips and changing the volume levels. When overlapping sound clips, we had to ensure that they mixed well together so that it didn't sound like two completely different sound tracks. As you can see, we merged the sounds in order to achieve this. Another use of sound that we incorporated was our use of volumes. Some clips were louder than others which caused a dramatic effect for the audience and aided in the building of suspense and tension.


Music
When choosing music, we knew that we had to avoid copyrighted sound effects and songs. To do this, we used a software platform called 'YouTube'. On this, we searched for 'Royalty Free Music' and 'Copyright Free Music', this meant that we were able to use sounds that would not get our thriller removed off of social media. This was important to us as we wanted to appeal to a mass audience, and this would not happen if we used existing sound effects and songs by other people, as it would be taken down. Once we found the clips that we wanted to incorporate, we used the software platform called 'YouTube Converter'. This enabled us to download the YouTube sounds into iTunes, which we could then put straight onto iMovie when editing the thriller. Other sound effects that we used were on iMovie itself, and we mainly employed these to replicate loud bangs in times of suspense. 
Our thriller sound track was very similar to that of The Sixth Sense, as we felt that this movie was very effective with building suspense (as seen in my previous blog plost of 3 key moments of suspense). They incorporated high pitch sounds, deep and dark sounds and also silence. Although this thriller was of a different genre, we still felt that it was appropriate to adopt a similar sound track, as we wanted our antagonist to seem as scary as the supernatural is, making 'him' more unpredictable and dangerous to the audience.

Friday 10 March 2017

Props and costume

To cohere to the conventions of a thriller movie we decided to use props, such as weapons, to give to our antagonist. However,  we are also debating whether or not to let the victim also have a weapon. This would go against the typical conventions of our genre and would bring a unique aspect to our thriller.
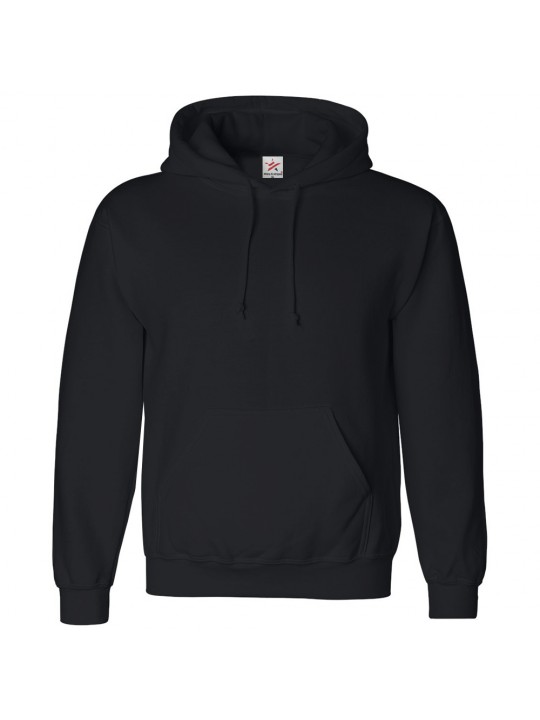
Nikki, Libby and I wanted to make our antagonist fit the part, by dressing him in dark colours. We decided we wanted a black hoodie within our costume as this makes our intruder seem quite anonymous and mysterious. The colour black is often associated with with dark and evil things, as it brings forth a sinister atmosphere. In all crime thrillers I have analysed, the antagonist is either dressed in dark clothing to conform to the norm, or they can completely go against it. This is by making the antagonist seem like a normal civilian (usually dressed in smart clothing)- and therefore makes the audience feel even more scared of this character, as they realise they can be deceived by anyone. Because of this, we wanted to combine the elements of both of these. We thought that a hoodie is quite a casual piece of clothing that most people would wear, however, the black also brings an aspect of darkness to the character. Therefore ,we can make a connection between how our audience will be scared of the fact that anything can happen to them in the safety of their on homes, and how they can't trust anyone as they may turn out to be your worst nightmare.
When thinking into costume choices in detail, we decided that we wanted our antagonist to fit the part in every aspect. Wearing these type of shoes makes the antagonists feet look bulky. This overall makes him look dominant and controlling. This is also a typical shoe for intruders to wear, as they are very popular and are worn a lot by most individual's within our society, this means the police would find it harder to track down the antagonist just by evidence left behind (such as a foot print), as most people would have these shoes. Therefore, this once again makes our antagonist look like a smart and experienced killer.
Similar to the other costume choices, we decided that we wanted our antagonist to wear all black jeans. This is because it fits the costume and colour scheme, and overall works well together to form a typical antagonist.
We came to a consensus that we wanted to make our antagonist seem as anonymous and mysterious as possible. We throughout we would do this by including a black mask and black leather gloves into our antagonist costume. As well as gloves hiding evidence via finger prints and DNA, which makes the antagonist look smart and cunning, it also looks creepy, and lets the audience know that the antagonist is obviously planning a brutal attack. This is good at building suspense for the audience.

In regards to the victim character, we wanted her to look as weak as possible. This gives the audience the sense that her fate is sealed and builds suspense as they are then nervously waiting as to what will happen next. As you can see in this screen shot from the movie 'Mean Girls', the bedroom of Regina George s a typical girly room. To crate this atmosphere, my group and I are going to use candles, girly music, fluffy pillow and bright colours to put across the idea to our audience that our character conforms to the typical stereotypes of a young female victim.  We want to make the audience feel as if our victim is in a safe, homely environment. This will cause our thriller to be much more effective, as it reminds the audience that no one , no where, is safe.  Therefore we will use props such as candles, fluffy pillows and more.
The last two props we will use is a laptop and a phone. We decided we wanted to include these as they play a key role in making our thriller storyline make sense. Out victim is seen on the phone with her friend, and using her social media via her laptop to contact her boyfriend. It's also typical of a teenager to have these type of hardwares, meaning we are conforming to the stereotypes of youth representatives, therefore, making our character more convincing.